Archive for September 2010

Wednesday, September 29, 2010

seven-petal crochet flower pattern

I've had tons of requests for the pattern to this wide-center, seven-petal flower I crocheted for my bookmark post. I am really bad about writing down patterns for things--I usually just play around with my yarn and different sized hooks until I make something I like. So I finally had a chance to go back and figure out exactly what I did (thanks for your patience!). Luckily it's a really easy flower. It's similar to my five-petal pattern, so if you've tried the pattern in my How to Crochet A Flower video, you can do this one, too.


Seven-Petal Crochet Flower Pattern


Rnd 1: Ch 3, sl st to beg chain to form a ring.

Rnd 2: Ch 2 (counts as first dc), 6 dc in ring, sl st to top of first dc. (7 dc)

Rnd 3: Ch 2 (counts as first dc), 1 dc in same st, 2 dc in each of next 6 sts. Sl st to top of ch 2. (14 dc)

Rnd 4: Change thread color if desired. *Ch 2, 3dc in next st, ch 2, sl st in next st* across. Fasten off.

See--easy peasy! I like using a #10 crochet thread or embroidery floss for these little flowers, and a size 4/2.00mm hook. They're perfect for cards and scrapbook pages. But they can be done with any weight yarn and any size hook.

To add another petal, like in the eight-petaled flower below, simply add an addition dc in round 1. That will give you 8 dc, which will give you 16 dc on the next round, which is enough for 8 petals. E-mail me if you have questions!

share this on »
{Facebook} {Twitter} {Pinterest}
33 Comments

Tuesday, September 28, 2010

prettylicious giveaway winner

Thanks for entering our prettylicious giveaway. What a perfect one for football season, right? Well, the giveaway has officially closed and we would love to announce the winner of a headband of their choice.

The winner is....

Settee


Congrats! Please email us at littlebirdiesecrets@gmail.com so we can put you in touch with the sponsor.

share this on »
{Facebook} {Twitter} {Pinterest}
2 Comments

Monday, September 27, 2010

got home to new crate paper!

I'm back! Japan was absolutely fabulous--more on that later. I still have loads of laundry to do and I've got to go grocery shopping--no more eating out every meal! But I had to show you what was waiting for me when I got back. A package from Blue Moon Scrapbooking, my fave online scrapbooking sites. They're one of our affiliates and they are seriously amazing--I love their videos showing the new product they've gotten in. Eeee! I love getting packages!

I've got a ton of first-day-of-school pics to scrapbook, so Crate Paper's School Spirit chip stickers that they sent will be perfect. I love the colors and the funky boy accents, like a guitar and lots of sports equipment. And of course the little bus is adorable.


I also got a set of the Crate Paper Restoration Collection border stickers. I can't help myself--I always end up adding a little something girly to my boys' pages, so these lace borders in the same colors as the School Spirit collection will be perfect. I also got some of the Basic Grey Wander line which uses the same colors. This Wednesday is scrapbook night at my house--check back to see what I came up with using all these new goodies!


Let's take a little poll while we're on the subject: Have you scrapbooked this year's back-to-school photos yet?

share this on »
{Facebook} {Twitter} {Pinterest}
7 Comments

Friday, September 24, 2010

our favorite fall cookies


Remember last year when we had our virtual cookie exchange? Yes, we saw some delicious recipes. Mandy shared her favorite Ginger Cookies which are absolutely divine. We are both hooked on them. I use a similar recipe that I found on The Pioneer Woman's site. They are called Spicy Molasses Cookies and they are to die for....really. They fill your home with a delicious aroma as they bake and they are just perfect for fall. Enjoy!

Molasses Cookies
1 cup sugar
¾ cups shortening
¼ cups molasses
1 whole egg
2 cups flour
2-½ teaspoons baking soda
1 teaspoon cinnamon
1 teaspoon ground ginger
½ teaspoons ground cloves
¼ teaspoons ground cardamom
¼ teaspoons salt

Preheat oven to 350 degrees. Mix sugar, shortening, molasses, and egg together until well combined. Dump in dry ingredients, stirring dry ingredients together lightly. Mix together until dough is combined. Roll dough into walnut-sized balls, then generously coat each ball with sugar. Place balls on a baking sheet and bake for 9 to 11 minutes, allowing to bake for about a minute after cookies begin to crack. Remove cookies from baking sheet.

share this on »
{Facebook} {Twitter} {Pinterest}
12 Comments

Thursday, September 23, 2010

crochet baby hat patterns & more from japan

Today we visited the golden temple, Kinkaku-ji, in Kyoto. Can you imagine how long it must have taken to apply gold leaf to the exterior of this entire building? And I think a quilt takes a long time to finish!


And here we are soaking our tired feet in a natural hot spring. My husband thinks we should open one of these in the mall. :)


While traveling by plane and train this week, I've had plenty of time to crochet a few baby items for my new niece (just born this week) and nephew (coming soon!). This pattern is my old standby for baby boys. It's quick and easy, but a little more interesting than just a plain beanie. It has a faux flap where you can attach buttons. I love it. It's the Easy Big Button cap from the littleprojects etsy shop. (I've used a couple of her patterns and they're great.) The pattern is for an adult hat, but I made it for 3-6 month old baby by following the same pattern only using a size J hook and a worsted weight yarn (the pattern calls for a K hook and two strands of a thick and quick yarn). Isn't it adorable on baby G, back when it actually fit him? I think he's outgrown it since this was taken!


I've also had time to finish writing and testing my patterns for a sweet baby girl hat and booties that I promised forever ago. They may be a bit different from the original, but just as cute (or cuter). Here's a sneak peek.

As soon as I get home and unpack, I'll get the patterns in the shop. Both the beanie and the booties will have flower patterns included. They're quick and easy, especially compared to gilding a temple!

share this on »
{Facebook} {Twitter} {Pinterest}
7 Comments

Wednesday, September 22, 2010

prettylicious giveaway

Prettylicious was created by two cousin-in-laws, Tessa and Heather. The two of them have always enjoyed crafting and making accessories for themselves, friends and family. Both Heather and Tessa are also big sports fans and can't help but dress up for games. Tessa said, "After we discovered etsy we decided to give it a try, with the hopes of supporting our crafting addictions:) We started our two shops, one a little more formal and trendy (Simply Polished) and the other one (Prettylicious) for the female sports fans out there. So it happened, and we just can't stop."


Tessa also said, "We LOVE our team colored headbands and have been pleased to hear back from customers how well they fit and stay on. They fit most older girls, tweens, teens and adults. They're great for back to school, school sporting events, school uniforms, work uniforms, dance teams and for the supporting mothers, sisters, girlfriends, wives, and daughters."


Today, Prettylicious is giving one of our readers a chance to win a fabulous headband! The winner can pick whichever headband they want and if school colors are not available, they are more than willing to make something for anyone. All you have to do is visit Prettylicious and look at all the headbands, then come back and tell us which colors you would choose or have made for you if you win! The giveaway will end on Monday, September 27th at 11:59 pm PT.

share this on »
{Facebook} {Twitter} {Pinterest}
220 Comments

Tuesday, September 21, 2010

anywhere bib clips tutorial - reader submission

Greetings from Japan! A couple of you guessed where I'm traveling this week, probably from the washi tape.


Here's a sneak peak of what I've found so far. Love this stuff!


So while I'm away I'm getting a little help from readers to keep the crafty goodness coming. Today's tutorial is from Amy at Naptime Crafters. This is a brilliant (and easy) way to turn any napkin into a bib! Thanks, Amy! Enjoy!


Bib or Nursing Cover Clip Tutorial

Turn anything into a bib! You know the moment: your baby is in white, you packed a jar of sweet potatoes, and you forgot the bib- not good... Trust me I've tried tucking a napkin in- the results weren't pretty. So... the bib clips were born. Turn napkin, paper towel, burp cloth, etc. into a bib

Bonus- you don't have to cart home a nasty bib.

They also work great for turning any blanket into a nursing cover.

Materials:

  • 2.5 x 16" piece of fabric
  • Suspender Clips
  • D- rings
  • Tiny hairband (optional)
1. Decide how long you want your bib to be. If you don't ever want to use it as a nursing cover- I would make it a bit shorter than mine- maybe use a 12" piece of fabric. Make sure you cut the fabric wide enough that after you've sewn it together it will slip over the suspender clips.
2. Fold your fabric right sides together and sew shut. Cut off a 2.5" section. You should now have 2 fabric tubes- one short and one long.

3. Turn your tubes right sides out. For the long one I used a crochet hook to shove it through.

4. Cut your suspender clips in half. Tuck the raw edge under on your long tube and slip it over a suspender clip. Topstitch down.

5. Tuck the raw edge under and slip it over your other suspender clip. Slip the D-rings onto the strap then topstitch both ends onto the suspender clip.

5. Feed the long end through the D-rings and you're done! I used the tiny hair tie to secure the loose tail.


share this on »
{Facebook} {Twitter} {Pinterest}
9 Comments

Monday, September 20, 2010

pear butter


We recently showed you how to can peaches. Last week I worked on canning my two boxes of pears. The process is quite similar to that of the peaches. You can click here for some great information and directions on canning pears.


After bottling my boxes of pears, I had a few left that I knew we couldn't eat. I had this recipe for pear butter that I was dying to try. I bottled it in small bottles because it's pretty rich, and I didn't think it would be something people would eat on everything.

Pear Butter

6 to 7 lbs. pears (about 20 medium)
4 c. sugar
1 tsp. grated orange peel
½ tsp. nutmeg
1/3 c. orange juice

To make pulp: Wash pears. Core, peel, and slice. Combine pears and ¼ c. water in a large saucepot. Simmer until pears are soft. Puree using a food processor, food mill, or blender, being careful not the liquefy. Measure 2 quarts pear pulp.

To make butter: Combine pear pulp and sugar in a large saucepot, stirring until sugar dissolves. Add remaining ingredients. Cook until thick enough to round up on a spoon (took me over 2 hours!). Cover with lid if it begins to bubble and splash out of pan. As mixture thickens, stir frequently to prevent sticking. Ladle hot butter into hot jars, leaving ¼-inch headspace. Remove air bubbles. Adjust two-piece caps. Process 10 minutes in a boiling water canner.


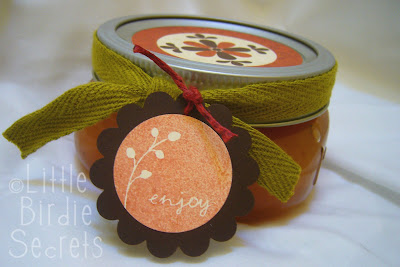
Add some decorative paper to the lid, a tag, and wrap a ribbon around it and you have an adorably delicious gift!

share this on »
{Facebook} {Twitter} {Pinterest}
10 Comments

say it on the wall winners and a special offer

The Say It On The Wall giveaway has ended and it's time to announce our two winners!

The winners each get a $20 gift certificate to spend at Say It On The Wall....

The Palmers

and

Betsy Knight

Congratulations! Please email us at littlebirdiesecrets@gmail.com so we can put you in touch with the sponsor.

And a special discount for all of our readers. For this week only you can get THIS item for 40% off! Just enter code LITTLEBIRDY40 at checkout.

share this on »
{Facebook} {Twitter} {Pinterest}
1 Comment

Friday, September 17, 2010

jet setting plus braided rosettes

I'm sitting in the Seattle airport, on my way to somewhere exciting. Here's a hint: I'm hoping to find lots of the printed masking tape shown below when I get there. I was told it was everywhere. Any guesses?


This last rosette tutorial is so simple I didn't even take pictures step-by-step. Okay, the real, honest truth is that I was so busy cleaning and packing and planning for this trip that I didn't have time to take pictures. But really, it's easy.

This is the braided rosette. It's a little different, but it fits in nicely with it's fluffier friends. In fact, I like to incorporate them with my regular rosettes when I make my rosette bib necklaces, just to add some texture.


1. Start with three narrow strands of your fabric. (1/4" to 1/2" wide, 22" long). In the pink rosette, I used two strips of one pink shade, and a third strip of a slightly darker pink fabric to make it interesting.

2. Hold the three strands together and tie a knot at one end. Now braid the pieces together. You can use a small dot of fabric glue to keep the ends together if you want. I don't bother.

3. Roll the braid around the knot to create your rosette, adding a dot of glue about every 1/2 turn. Finish as you did the regular rosette. That's it!


More info on the rosette-themed mini class when I get back from my trip. Stay tuned!

share this on »
{Facebook} {Twitter} {Pinterest}
7 Comments

crafty kids model winner

Thanks for entering our Crafty Kids Model Giveaway! We are excited to announce the winner of their choice of the Shuttle Imagination Craft Model or the Creation Cottage Craft Model.

The winner is.....

Robin from the Imse Family

Congrats! Please contact us at littlebirdiesecrets@gmail.com so we can put you in touch with the sponsor.


share this on »
{Facebook} {Twitter} {Pinterest}
Add a comment

Thursday, September 16, 2010

ruffled book paper table runner

We're guest posting over at Make and Takes today. It's a super easy table runner made from book pages. Check out our tutorial!


I made the original ruffled paper runner (out of wrapping paper!) for a shower I helped give last week for a Lasting Memories friend. It was SO fun to have a reason to make fun paper decorations. The colors we chose were black, white, and aqua. I went through my paper stash (both physical and digital) and came up with a banner, a couple of buntings, and some coffee filter pom poms. My husband couldn't quite get why I was spending so much time making paper decorations for one little party. I simply told him, "It's what I do." His response: "Well, whatever makes you happy." Exactly. After 11 years of marriage, I'm glad you finally figured that one out, Love.


The bride-to-be, Miss London of Such Sweet Tierney. (Check out her Etsy shop when she gets back from her wedding week. She is super-amazing.)


This bunting was probably my fave. I cut different doilies out of patterned paper with my Silhouette machine. Then I cut them in half and stitched them together on my sewing machine. The original idea came from a fabulous friend on this post. Thanks, Beth!


Yes, I kept it all. I need to think of a reason to have another party so they don't go to waste. :) Tea party at my place, anyone?

share this on »
{Facebook} {Twitter} {Pinterest}
16 Comments

Wednesday, September 15, 2010

weekly wipe-off menu board & magnets

For everyone who placed a pre-order for the pinless flower magnets, magnets have shipped! You should have them soon. There are still a few more left in the shop.

I found another great way to use these super strong magnets. Remember my original guest post over at Make and Takes? Well if you missed it, here it is again, with a twist. I added four of my magnets to the back (one on each corner) and hung it on the side of the refrigerator.

I'm much happier with it there. It just works better in my kitchen. So the pinless flower backs aren't just for flowers I guess! If you didn't get some yet, I have a few more listed in the shop (and more on hand if you need higher quantities), but get them quick--my store will be closed starting this weekend while I'm out of town for a while.

Wipe-Off Menu Board Tutorial

Supplies:

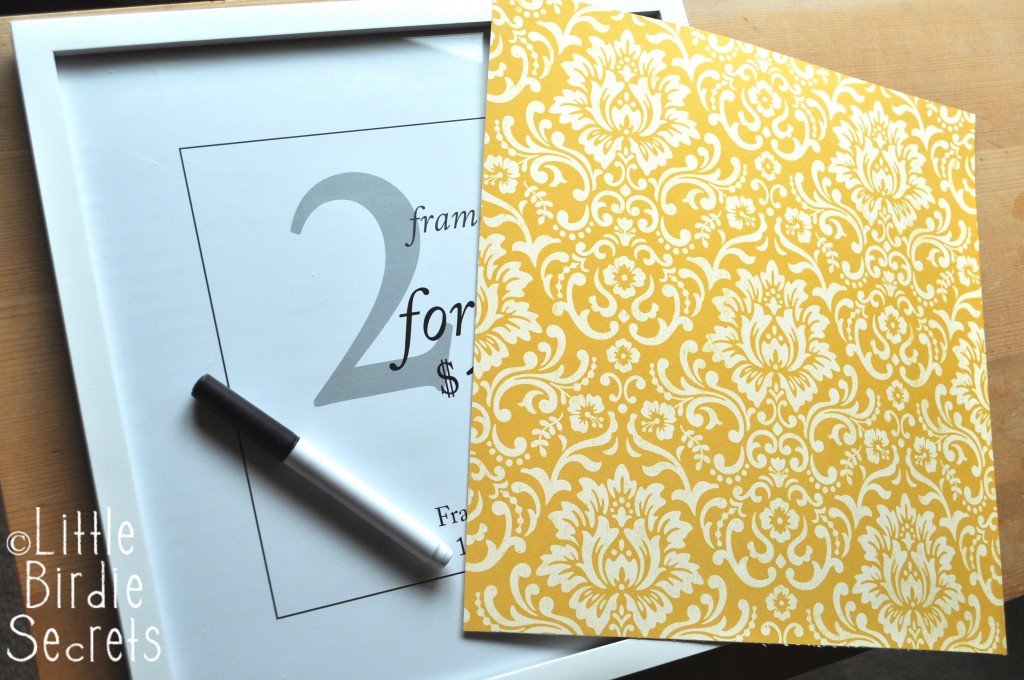
  • Picture frame with glass front (I love these 12×12 frames I found at Ben Franklin for only $7!)
  • Piece of patterned scrapbook paper to fit in your frame (mine’s also 12×12)
  • Optional: Vinyl cut letters for each day of the week (you could always just hand write them)
  • Dry-erase marker
  • Optional: four heavy-duty magnets to hang it on your refrigerator

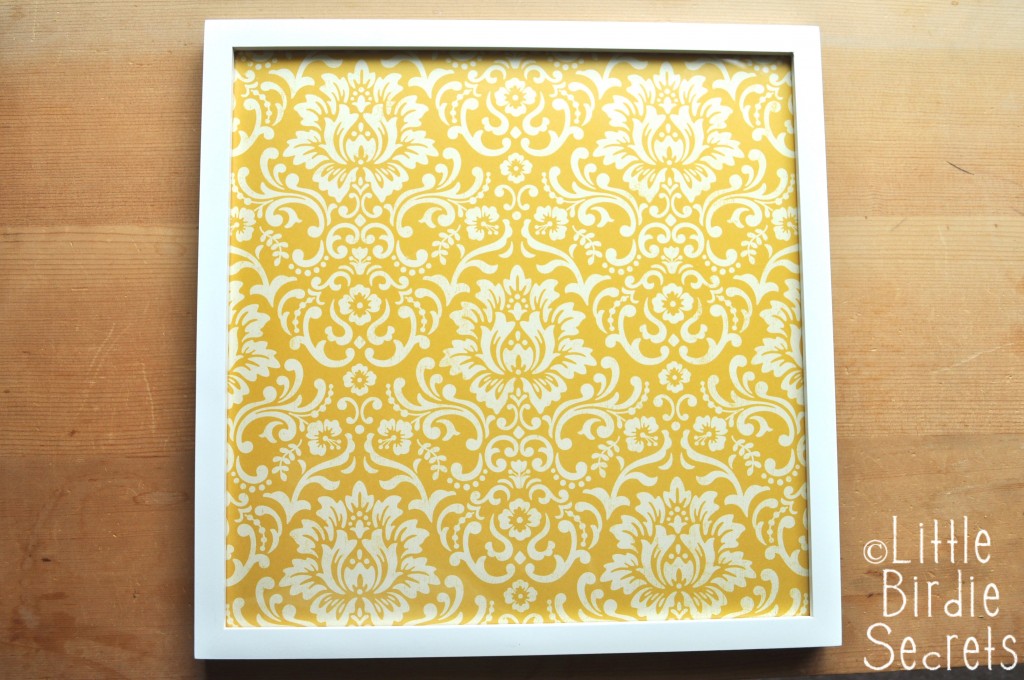
1. Put your patterned paper inside the frame. Replace the back. That’s pretty much it. :)

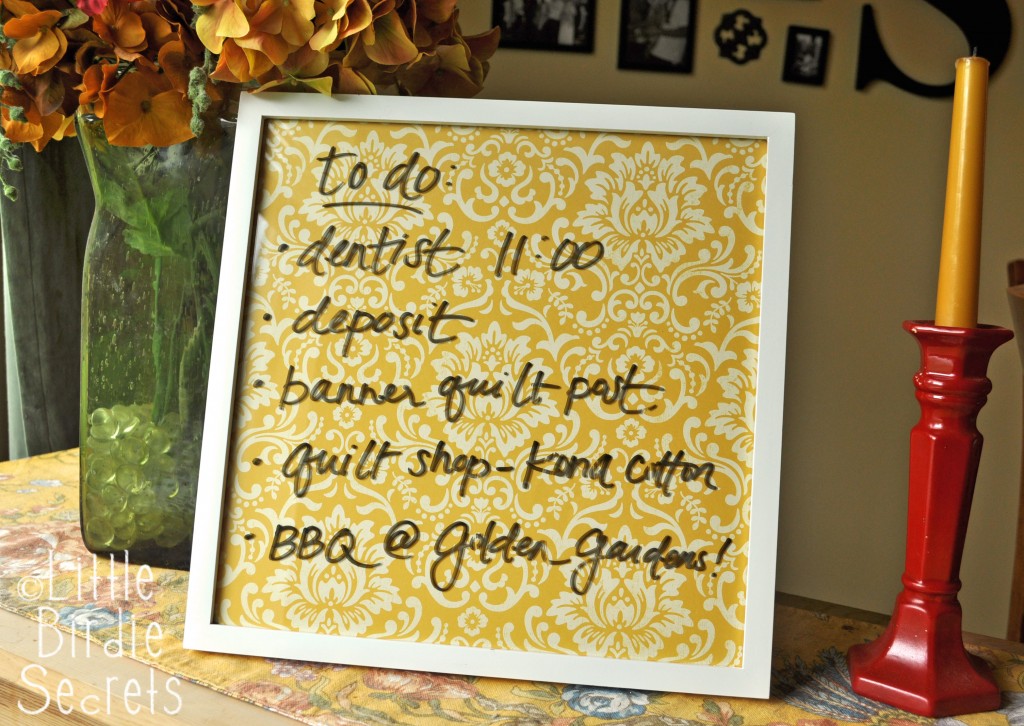
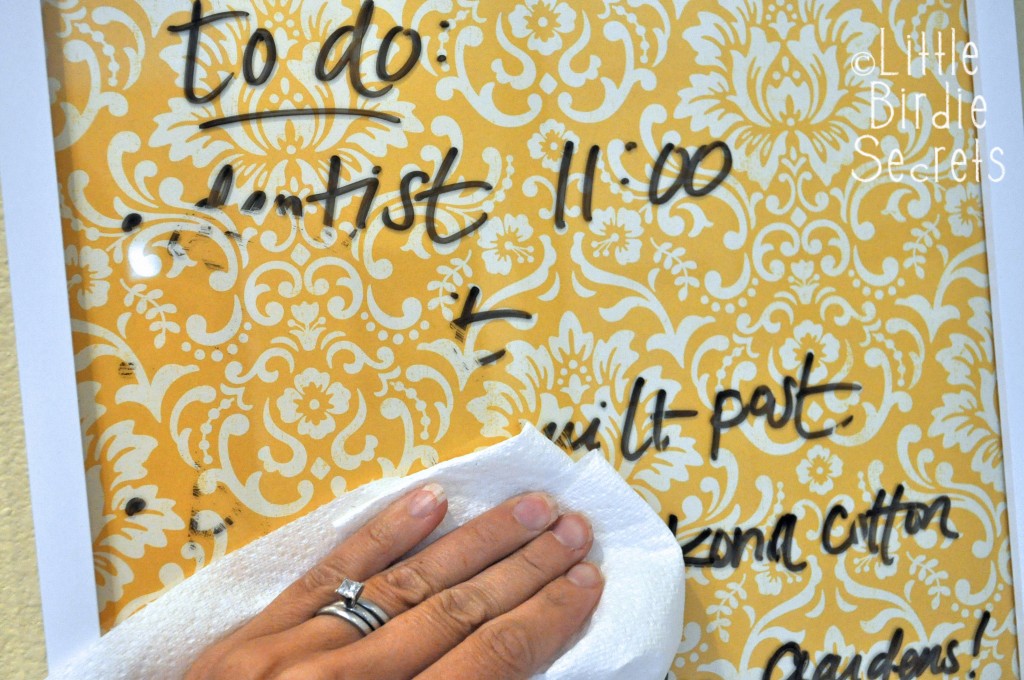
2. If you wanted to stop here, you could hand-write your days of the week on the glass, or use it as a message board / to-do list. I love that these frames can stand or hang on the wall so you can do whatever works best in your space!

3. Use a paper towel or cloth to easily erase dry-erase marker off the glass.

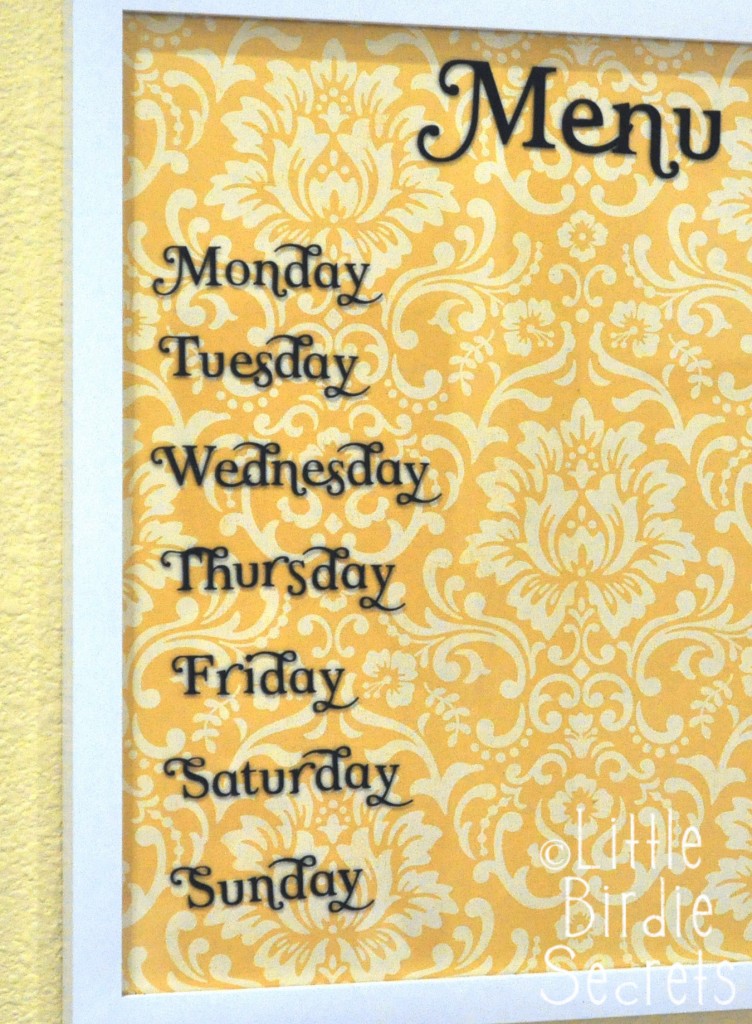
4. If you want to get fancy and go a step further, you can add vinyl lettering for the days of the week. I cut these letters with my Silhouette machine, using Creating Keepsakes “Woodbine Swashes” font. (Try not to notice how crooked “Sunday” is. I didn’t notice until after the picture was taken. Luckily, it’s easy to fix!)

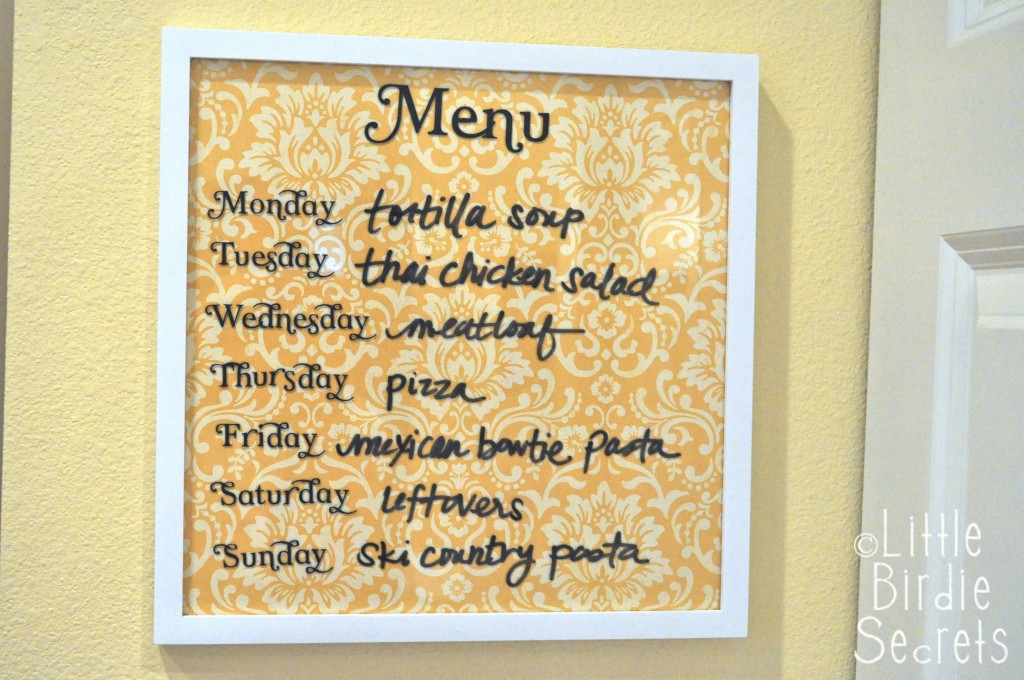
Now everyone in the family knows what’s for dinner each week!

The best part about this project is that it is SO easy to change the paper if you decide to change your decor, or if you just get tired of it. So you’ll really use it for years to come!

share this on »
{Facebook} {Twitter} {Pinterest}
31 Comments
LinkWithin Related Stories Widget for Blogs